|
4/21/2018 0 Comments Post 6 - ProgressI. Revised proposal – When it comes to buying and selling online, using photos don’t always tell the full story. If you’re selling a portable game system, the customer can’t hear the sound working, or see interactions such as gestures on the screen, and can’t make out the details of the condition of the casing. With video, you can hear the system, and you can maneuver the system and explain what the person is seeing. How would this look? To accomplish this, an interface that allows users to post video for a duration of time 30-50 seconds, tag it with additional information (ex: price, location, color). There will be simple and clean buttons such as a “Share” and “Message”, and “Offer” (if the seller allows to take offers). Features on the video will include “Play”, “pause”, “rewind”, “fast forward” and “zoom” II. Planned approach to reach your goals –
 III. Depiction of the Process
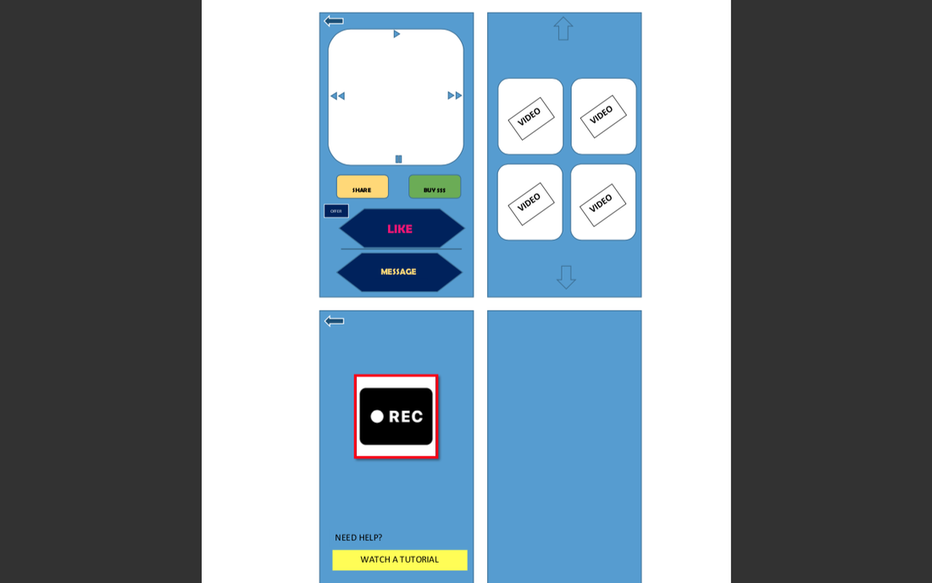
The area that I focused on is the design of the interface for the recording feature. My goal was to give a a prototype of what the app or feature would look like. There is another major problem right now to the problem which is getting the video to feel easier and more convenient to use than photos (still working that through). I used Microsoft word to make the templates. I have a vision for the layout to look a little more retro to start, inspired by Craiglists simplicity. The first template is what the customer would see if they tapped on the video of the item they are interested in. There are a few buttons here such as “buy”, “share”, “offer”, “message”, and “like”. The second template is a browse view similar to how Instagram operates with photos and videos. The third template is for the seller to post a new recording and there is also an extra button to watch tutorials on how to list using video. Some of the challenges here was to make multiple templates that others might find easy to use. So far, I’m about 75% to meeting my goal. I still need to create a tutorial to show others how to post videos more efficiently than using photos.
0 Comments
4/7/2018 0 Comments Post 5- Proposal Progress1. Creativity strategies The creative strategy that I used this week to make progress on my is called Visualize (pg. 107 , Sawyer). I used it to imagine possible outcomes that would make the feature more usable. 10 things to make the feature usable 1. make the feature an option to start. this means integrating the feature into an existing app if possible 2. develop a preferred method to post the video. This means creating a preferred step by step process. The intention is to save sellers time while still maintaining a detailed description of the item they are selling. 3. have a feature that rates the sellers video right after the video is played to inform the seller and platform weather the video upload a full description of the item (what it is, condition, model, brand, size, etc) 4. Only let proven sellers use video uploads so that they may lead the example of how to upload video sales 5. Make features such as live video auctions. 6. HD video is necessary 7. have the video icon easily accessible 8. don’t require audio description 9. have a time limit per recording 10. have others test it 2. Multimodal I tested how long it takes me to take photos of an item that I am selling, crop it, and upload it to a site like Ebay. It took 6:00 on average Afterwards, I After, I recorded video of the same item and tried to include a description. It Wasn't efficient for me because I forgot to include details or fumbled the camera at some point. So instead, I decided to only upload video of the item with no audio included. This was somewhat easier but still wasn't faster than uploading photos. It took 15minutes for me to get a good video. [place video here] 3. Depiction of your creative process To make progress on the proposal for my final project I needed to figure out how the figure would integrate into an application. To do this, my first step was to use [insert creative strategy here] to come up with a strategy to make the feature usable.
4. Reflective One thing that helped my creativity was testing the ideas I had in mind are use this feature in an application. By taking the time to record a video and try to give a verbal description I learned what worked and what didn't. One thing that hinder this process is the lack of resources for steadying the camera and not having the ability to upload the video to a site like ebay. 5. Next steps
The next steps are to try retesting this process without taking the time to give a audio description of the item instead Using the voice to text feature built inside of the app to describe the item 3/18/2018 0 Comments ProposalProblem Statement:
If a photo is worth 1000 words how much would you say a video is worth? The most popular apps and sites today cling to old ways of sharing media. So far I’ve found no other buying/selling applications that allow this feature. It is strictly limited to uploading photos of the item/items. Making an application that allows for video uploads as the primary resource for will bridge the gap that e-commerce build and cross over to the next generation of media sharing. Other features on the app are possible with this vision, like live auctions, live listings, and more. Depiction of the Problem. As someone who sells and buys things over the internet, taking photos takes a lot of time, and I still have to have written text on the description of the items I am listing. The 5 whys Why are customers unsatisfied with their order?
Why haven’t they already integrated this feature into existing buying/selling apps?
Why does this help the current platform?
Stakeholders: Stakeholder 1 1. What is your relationship to [the application]? Customer 2. What are your primary concerns about [the application]? “Is it really faster and more convenient?” 3. What story can you share to help us understand your perspective about [this application]? “It’s frustrating when you purchase a used item and there’s defects or flaws beyond what is described in text or shown in photos of the item.” 4. Are there any "pain points"? What is not working well? What, if anything, would you like to see changed? “I have a hard time believing its faster to post a video versus taking a picture. How are you going to prove it’s faster, and how will you motivate people to change their ways of uploading pictures primarily.” 5. What cannot be changed? How do you know it cannot be changed? 6. If [this application] worked really well—better than it does now—what would the outcome be? “Features like, ‘Live Auctions sound like it could really cool and could propel the application forward” Stakeholder 2 1. What is your relationship to [the application]? Seller 2. What are your primary concerns about [the application]? Migrating to verbal descriptions along with uploading video media. Not having enough time to accurately describe a complex listing, such as a house or vehicle. Sellers who don’t speak English may use a text translator to overcome this obstacle. A seller who doesn’t speak English as a primary language will have a more difficult time giving verbal descriptions of their items. 3. What story can you share to help us understand your perspective about [this application]? “I’ve sold items that were returned damaged or tampered with. Having the ability to upload video footage and voice to describe the item, it will help ensure sellers from being victims of fraudulent transactions.” 4. Are there any "pain points"? What is not working well? What, if anything, would you like to see changed? “Although the app would gather a voice description from the seller of the item, it’s still important to emphasize an accurate text listing.” 5. What cannot be changed? How do you know it cannot be changed? Video footage doesn’t guarantee an item’s longevity especially when it comes to electronics. It can work on film and arrive defective. There would be too much payout from the app towards defective items. 6. If [this application] worked really well—better than it does now—what would the outcome be? Stakeholder 3 1. What is your relationship to [the application]? Investor 2. What are your primary concerns about [the application]? “Cost to get the application set-up and to maintain the application.” Liability. No easy way to include text listing which will remain necessary. 3. What story can you share to help us understand your perspective about [this application]? “As a buyer and seller of products, it’s frustrating that no other popular application supports video uploading as a feature to describe an item.” 4. Are there any "pain points"? What is not working well? What, if anything, would you like to see changed? “The application is more of a feature to be added to many existing buying/selling applications. How else are you going to make the app unique and attracting to make people want to download and use it?” 5. What cannot be changed? How do you know it cannot be changed? 6. If [this application] worked really well—better than it does now—what would the outcome be? “Many of the other major buying/selling applications will adapt and integrate these features into their current systems. Our application will innovate and lead the industry in new features and methods to deliver sellers and buyers a better experience.” Revisiting the Problem: Videos allow for customers to see more details about the products that they are buying, but sellers can post more products, and save time. Ideally, it will lead to more positive transactions between the customer and the seller (benefit to customer), and make it more convenient to list (benefit to seller). I think it will be an easy transition for everyone to make. Plan: To make progress on this proposal the next thing is make a model of how the feature or app would work. In order to prove that videos are more efficient than photos for buying/selling testing will be necessary. This is where I may have having an issue because I won’t be able to test the feature inside of any application fully. I will need to develop a way for users to test the feature or at least gather more input from users and use that to optimize the feature. The next step is to make a model on paper perhaps, and develop a method to test the efficiency of features. 2/24/2018 0 Comments Replace MacBook Pro Battery1. Problem Type This is a problem that I’ve had in the past (replacing my laptop battery). In this guide, you’ll find insights that allowed me to replace the battery safely, easily, and quickly. Unfortunately, I didn’t take that extra moment to set up my camera to get video and pictures of the repair. Hopefully this guide is descriptive enough to help anyone who’s also needing to replace their MacBook Pro battery. Enjoy. 2. Creative Strategies The creative strategy that I used this week to make progress on my is called Visualize (pg. 107 , Sawyer). I used it to imagine how to make this process easier. 5 things to make this easier 1. use isopropyl alcohol 2. get someone to help 3. have a clean workspace 4. prepare all the materials needed to complete the job 5. record the process with pictures, video, or audio 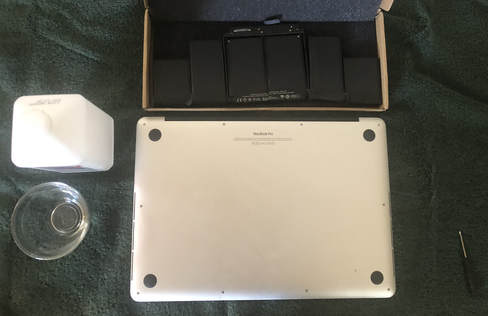 What you'll need: MacBook Pro early 2013 Replacement battery Isopropyl alcohol A cup (measuring cup works good) String Razor blade A friend or somebody to help 3. The Process A week before the semester started I noticed that my laptop (MacBook Pro) was not holding a full charge. The battery indicator on the laptop would show between 30-50%, but it would go dead. This issue became more frequent, and so I purchased a new battery for it. I've never replaced a battery on this computer or any other laptop, but I figured that, "it'll be easy". Also, Apple charges $199 for this repair and by replacing it myself, I'm saving $149. It took 5 days to arrive in the mailbox. Cool! There were two common methods that found after watching several videos on how to replace the battery. The first was drip isopropyl alcohol into the casing so that it removed the adhesive from the underside of the battery. Once the isopropyl alcohol is inside the casing, shift the casing from side to side so that the liquid spreads to as much of the glue as possible. Then use a prying tool to remove the battery. The second method was to maneuver a string under the battery and then pull it from the adhesive. It was clear to me that the first method was messy because I had to spill isopropyl alcohol in the right places inside the casing and hazardous once I’d have to pry the battery with a tool. (puncturing lithium ion battery = bad). The second method was much safer but also more physically demanding because you have to apply a fair amount of pressure as you are pulling the string through. I combined what I liked from these two methods and added some finesse to make it my own solution to the problem.  The first step of course is to remove the small screws that lock the bottom shell to the rest of the casing. It requires a special screwdriver head to remove these screws, and the last thing you want to do is strip them, so get it right. After that get the cup and pour some isopropyl alcohol into it. Remember to close the lid to the isopropyl alcohol because it evaporates very quickly. Take your string and dip it into the cup so that soaks in the alcohol. Then, take the string and position it around the edges of the battery. Use a small screwdriver to help you push the string down, so that it's in a position to "lasso" the battery. Once the string is in position on both sides, get your friend or somebody to brace the laptop because you will need to apply pressure as you are pulling the string to cut through the adhesive. Have your friend or somebody stand facing towards you. They will brace the end that you will be pulling down towards so that it creates tension to help release the battery from the adhesive. As you are pulling down, also pull the string from side to side in a saw like motion to create friction. As you "saw" through you'll also notice the alcohol on the string helps lift the glue. This is the extra finesse that I was describing earlier. I didn’t find this technique in any video I watched, but the motion made sense to me as I was experiencing difficulty to pull down at first. Once you get to the bottom of the cell, remove the string and dip it back into the isopropyl alcohol once again, and repeat the process into the next cell of the battery. (There are 5 cells to be removed) 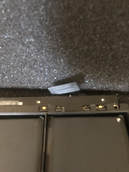 Once you've cut through all the adhesive, disconnect the ribbon that connects the battery to the motherboard and remove the battery. I cleaned the rest of the adhesive off with more isopropyl alcohol and razor blade. Now it’s time to put the new battery in. Remove the plastic film from the new battery so that the adhesive side is facing down toward the casing. Position the battery into the casing so that it fits. Once the adhesive touches the casing its more than likely you won’t get another shot at positioning it so try to be precise here.
Once the battery placed into position, apply some pressure for 30 seconds and release. Attach the ribbon on the new battery into the motherboard. Re-screw the bottom shell to the casing. It’s time to test. Turn it on. 4. Reflective My computer turned on like normal. I haven’t had any issues with the battery since. However, the computer is still shutting down and I’ve learned that I also have a failing GPU. So even though I didn’t see a full resolution to this problem, I now have an understanding of what really is the problem, and now I can decide how I want to proceed from here, either getting a new laptop or replacing the GPU. For now, I'm doing less on the laptop using my phone and tablet more. 2/17/2018 0 Comments Remove acid build-up.Cleaning my car battery terminalsI'm checking my car's oil, and I noticed that there was a lot of acid near the battery terminals. The inspiration for this post came from needing to find a way to clean the acid build up. 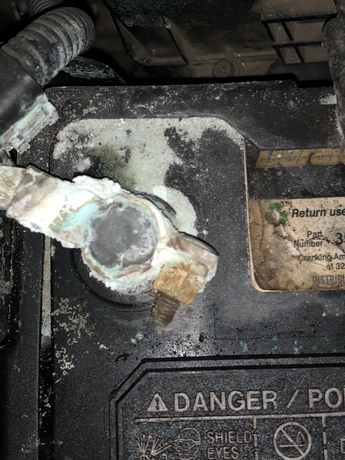 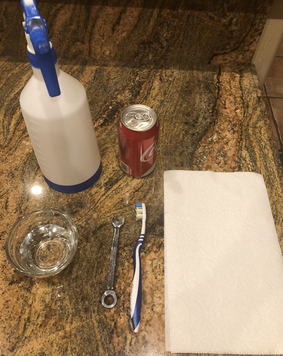 What you'll need: 1 can of coke 1 spray bottle 1 toothbrush 2 paper towels 1 wrench (to loosen bolts) 1 cup of water
Here's a video of the steps above - Now you're all set. Your car now has a strong, clean, and clear connection to it's battery and we did it a minimum cost, without buying any cleaners or solutions from the store. ReflectionThe first time I experienced this build up around my battery terminals I spent a lot of time trying to clean the terminals with just a rag. Of course, the acid didn't come off easily and so I tried to scrape it off with a screwdriver. This also wasn't efficient.
I researched online to find a solution to the problem. One of the methods I found was to mix baking soda with water but don't have any baking soda at the moment to work with. Finally, I find out that Coca Cola will also work. The phosphoric in Coca Cola helps eat away the corrosion. Overall this method was simple to understand and easy to execute. One of the issues I had was in trying to be multimodal for this post as I'm inexperienced with video editing. This post has allowed has given me an idea of how much planning and organization goes into being multimodal. I see where I can improve and have a clear direction on where I want to take my next post office 2/10/2018 0 Comments Creativity Post - 2 - My Collage My goal for this creative post is to combine photos that I took of objects around my house and images from online to make my own piece of art. I used design thinking to create the task, and produce the results. Design thinking is a problem solving strategy with 5 steps to help produce a better design, and more innovation. In the following, i'll explain how I used the design thinking method to create this image. EmpathyI was in need of a new creative activity that tested my limitations of my artistic ability and that I could do at home without a lot of materials. Many people don't have a collection of tools needed to paint or create for that matter, but most of them have a phone. I kept this in mind while designing this challenge. DefineAt first I wanted to upcycle something from the garbage for this post, but realized that pictures last longer. So I asked myself, "How can I make art from trash and other objects? How can I get people involved? The answer for me was to take their outlines and silhouettes and create a new image from it using Adobe draw on my iPhone. IdiateSo here's what you'll need:
PrototypeI took an empty bottle and an apple to start. I imagined what their outlines would look like on Draw, and realized that their outlines would make a profile perspective. Now that I had a foundation, I added to it. I used leg's from an old toy to give the figure more detail. I used a Tabasco sauce bottle to make the shoulder. I got the hand and the wolf head online. I used all of these elements with design principles of contrast, repetition, alignment, and proximity to get the final result. |
MY PROCESS1My first step was to prepare. I decided to use Adobe Draw to make my logo.It took an hour tinkering with the application to figure out it's basic functions, and that's how I learned about Adobe Capture.
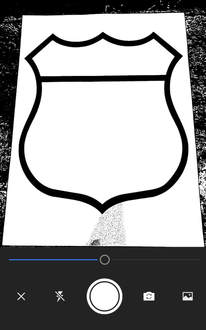
2Here is the image that I took of the Route 66 sign. My dad had a printed copy of the sign and wanted me to use it in the design of the logo. Adobe capture allowed me to take this image and turn it into a vector. I took the vector file inside of Adobe draw and used it.
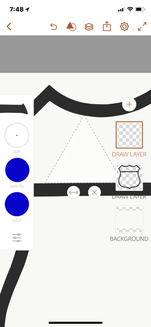
3The hardest and most time consuming challenge that I faced is that I wasn't able to find a text box feature on adobe draw. So instead, I used the tools that I knew of. I used the shapes tool and did my best to center the letters with the outline. I decided to keep the outline and the text black so that it would contrast when I filled the inside with color.
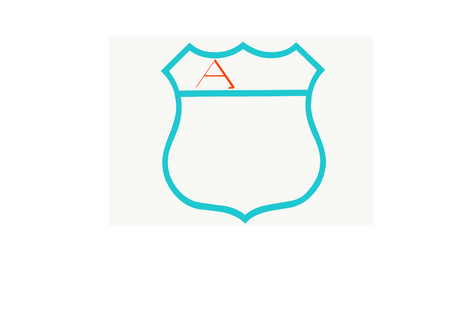
4I had several user related issues while making the logo. From my misuse, I destroyed many of the rough drafts. Finally, I was able to find a grid inside of the settings. I used the grid to help align the letters. After the letters were aligned somewhat, I filled in the logo with color. I decided to use bright colors to make the text pop. This is where I stop for now.
ReflectionThis project is an example of how I used the creative Process to solve an unfamiliar problem. I don't have a lot of experience with logo making but decided to take on the challenge. I used my cell phone to make the logo and although it was convenient, I can see myself having more efficiency from using an iPad. One thing that I learnIs that the Adobe draw application is very powerful, and I will continue to learn more of its features. By practicing and learning how to use the features in Adobe draw, the logo will become more refined and professional.
|